The new iPad models released by Apple in recent years all features high pixels retina display, which makes watching high definition movies on iPad becoming an immersive experience. However, due to the limited media types compatibility, iPad can play just few file formats. A lot of people try to use the free and open-source video transcoder - Handbrake 1.0.7 to fix this format incompatible issue, however, they feel a bit disappointed that Handbrake 1.0.7 has offered preset profiles for iPhone, iPod and also Apple TV, but not one for iPad. The following article will show you how to use Handbrake 1.0.7 to produce the best playback settings for iPad Pro/Air/Mini.
Using Handbrake 1.0.7 Apple TV Preset as iPad Settings
As both Apple TV and iPad support to playback high resolution video, therefore, the preset for Apple TV can be used for iPad when you are watching high definition movies on your iPad models. Following the steps below to output best iPad playback settings with Handbrake 1.0.7.
Step 1: Click "Source" button to load video files or DVD into Handbrake 1.0.7.
Step 2: Choose Apple TV preset
In the right panel of the program, from "Preset" drop-down list, to enjoy SD video on iPad, you can select "AppleTV" preset, to enjoy 720p HD video on iPad, "AppleTV 2" preset would be fine, as for enjoying 1080p HD video on iPad, "AppleTV 3" would be the best choice.
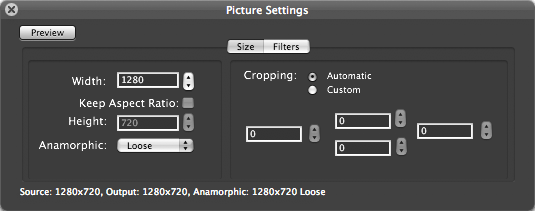
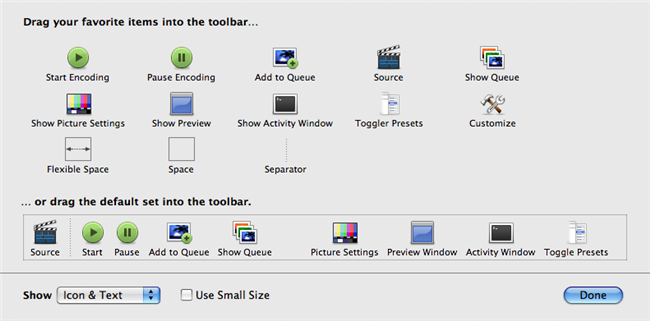
Tips: For HD output profile settings for iPad, make sure go the Picture Settings and set the resolution up to 1280 width. If the Picture Settings doesn't appear in the toolbar, you can right click the toolbar and then drag and drop the "Picture Settings" icon to the toolbar.
Step 3: After that setting, hit the "Start" button to start the conversion.
Handbrake 1.0.7 alternative to generate iPad preset playback settings
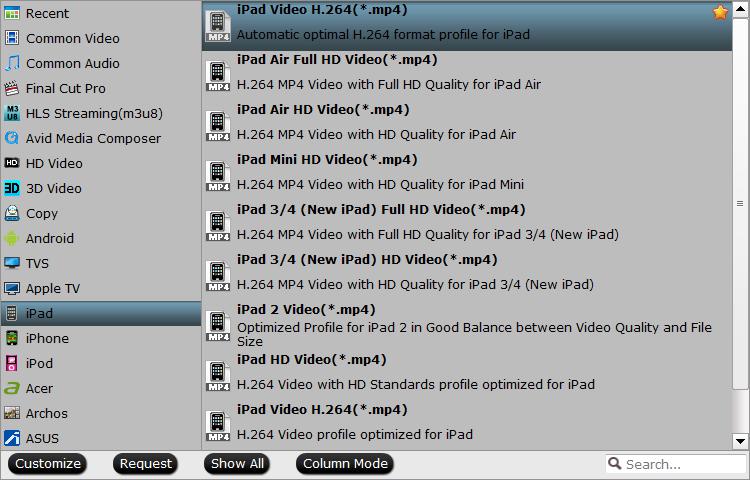
It would be a little tricky to use Handbrake 1.0.7 to generate iPad best playback settings. Fortuantely, there are some simple to use but advanced Handbrake 1.0.7 alternative program can complete the job perfectly. One of the application we highly recommended here is Pavtube Video Converter Ultimate for Windows/Mac (best video converter review), the program has full input support for all digital file formats with the resolution of 4K/2K/HD/SD and also commercial Blu-ray/DVD disc, as for the output options, you can find the specific "iPad" preset from its "Format" drop-down list, which includes various differnt presets for you to choose from.
- Preset profile formats for different iPad models including iPad 2/3/4/Air/Mini
- HD preset profile formats for iPad
- SD preset profile formats for iPad
Apart from that, if the video is too large and will occupy a lot of space on your iPad, you can use the program's built-in "Trim" function to cut off video to remove unwanted parts or segments or split the large video into small clips by file size, count or length.
How to Produce Best iPad Playback Settings with Handbrake 1.0.7 Alternative?
Step 1: Load video or DVD disc into the program.
Download the install the program on your computer, if you are Mac users, please switch to Pavtube iMedia Converter for Mac. Click "File" > "Add Video/Audio" button to import source video into the program. For loading DVD disc, insert your DVD disc into the optical drive, then click "File" > "Load from disc" to load DVD disc into the program.

Step 2: Choose output file format.
From "Format" bar drop-down list, navigate to "iPad" main category, from its drop-down list, select one of your desired iPad preset profile formats according to your iPad model or the file resolution that you plan to watch on it.
Step 3: Trim or split video for iPad.
Trim video length
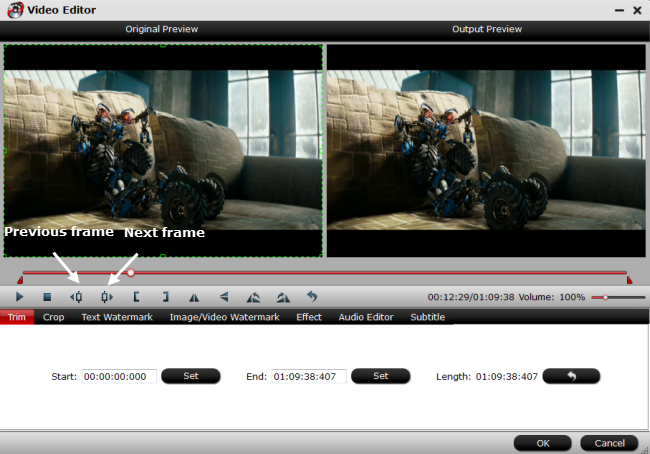
Open "Video Editor" window and switch to the "Trim" tab, you can drag the slider bars to include the segment you want to remain, click the left square bracket to set start point, and click the right square bracket to set end point when previewing the video or directly input specific values to "Start" and "End" box.
Split video file size
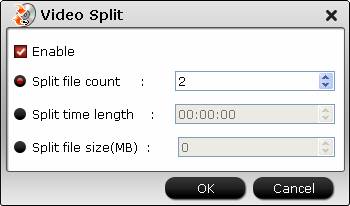
Click the "Split" button under file list to launch the "Video Split" window. Checking "Enable" to enable it, and then you can split the file by file count, time length, or file size.
Step 4: Begin the iPad prest formats conversion.
After all settings is completed, hit right-bottom "Convert" button to start video or DVD to iPad best playback settings conversion.
When the conversion is completed, feel free to transfer and play the videos from on your iPad Pro/Air/Mini on the move.


