But it is not easy to import the gameplay recordings to NLE software cause that the popular Screen capture software for gameplay often encode video into .avi format but AVI is somewhat obsolete and unsupported by most video editing programs developed in the past five to ten years such as iMovie, FCP, AviD, Premiere Pro CC, Davinci Resolve. Some gameplay video capture software on Mac also will export gameplay recordings in MP4 format with H.264 codec. However, althoug tech specs of some popular video editor programs suggest that H.264 is supported, H.264 is an expensive codec and you might need to pay to use H.264 format in some video editor such as Lightworks and some editing software is not compatible with H.264 codec well. Therefore, when you recorded gameplay videos and planned to edit them with iMovie, FCP X, Premiere, Avid, Resolve on Mac, you might need to convert your gameplay video.
How to Convert Gameplay videos for Editing on Mac?
It is easy to transcode gameplay videos for editing on Mac with popular video editor software. Pavtube iMedia Converter for Mac is a handy application that enables you to encode, join and split video, as well as extract audio and images. It can convert gameplay video to MPEG-2, ProRes, DNxHD, QuickTime MOV and more other video formats that are compatible NLE software. You can configure video and audio encoder codec, bitrate, sample rate, channel, etc to make the output gameplay video more compatible with Mac video editor like iMovie, FCP X, Premiere, Avid, Resolve...
Furthermore, the feature to merge multiple gameplay videos into a single one file and split a whole gameplay video to several clips by size and length is also supported. In the user-friendly interface you can access the main functions. So the video converter is suitable for any level users.
Steps to Transcode Gameplay videos for Any Mac Video Editor
Step 1: Import Gameplay recordings
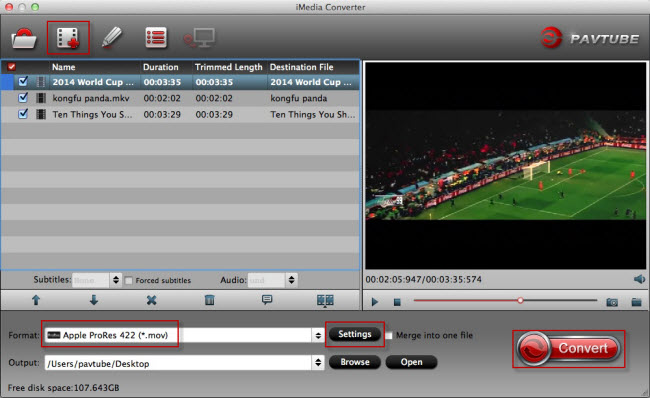
Start the Gameplay recordings video converter program on your computer, click "File" > "Load Video/Audio" or "Load from folder" button to import Gameplay recordings into the program. "Drag-and-Drop" and "Batch Conversion" features are also supported. If you loaded multiple Gameplay clips, you also can merge the video into a single one file.

Step 2: Choose format for Mac NLE Software
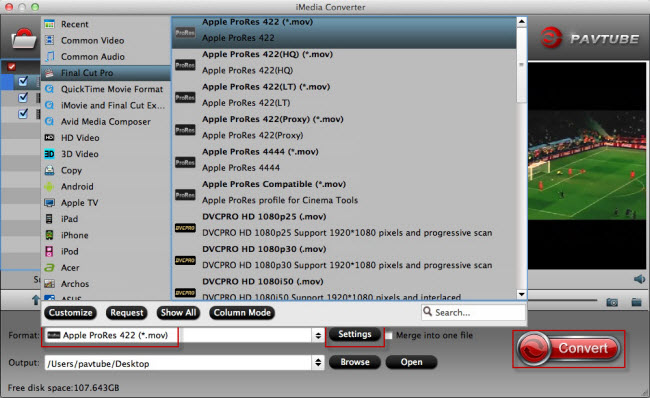
iMedia Converter offers hundreds of video formats. You can should choose the format according to your video editor supported video format. For example, if you want to edit gameplay video in iMovie, you can choose QuickTime MOV. If you need to edit gameplay video in FCP, you can choose ProRes format.
If you are not clear about your NLE software supported format, you can refer to the below guides:
iMovie Supported Video | Davinci Resolve Supported Video | Avid Media Composer Supported Video | FCP Supported Video

Tips:
1. Click "Settings" button if you'd like to customize advanced audio and video parameters like Video Codec, aspect ratio, bit rate, frame rate, Audio codec, sample rate, audio channels.
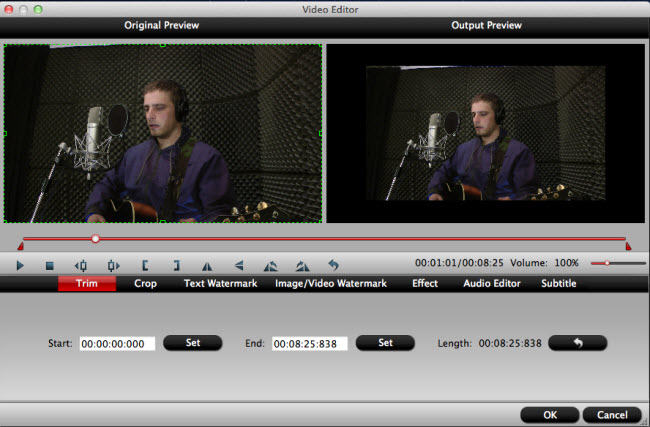
2. Before outputing your gameplay video for professional video editing, you can complete some basic video editing task with the program's built-in video editing function. Check an item to active the "Video Editor" function, then click the pencil like icon on the top tool bar to open the "Video Editor" window, you can trim video length, crop video black bars, add watermark, apply sepcial rendering effect, remove/replace audio in video, etc.

Step 3: Start to convert Gameplay video
Clicking the Convert button on main interface, you can go to Conversion window to start to convert Gameplay recordings to iMovie, FCP, Avid, Davinci, etc supported video format. After the conversion, you can click Open output folder to popup output directory with the converted files.
Now, you can load your gameplay video to your Mac Buy now $65


