Why will we upload videos to video websites like YouTube? People around you and even around the whole world will know what we are doing, what we are thinking, and what kind of personality we have, and we’ll gain more popularity and friendship by sharing a piece of self-created video onto YouTube.
To upload a video like in MTS format will run out of your energy for YouTube only accepts some specified formats for uploading. And to create a final piece with the raw MTS clips, you’ll need to edit MTS files in an editing system like FCE first. Do not import isolated MTS files into Final Cut Express because Final Cut will only deal with AVCHD files when it finds them in their original file structure. You’re suggested to have the folders exactly like they are on the camera. No matter what kinds of import and edit issue with FCE, you’ll need the help of a MTS to FCE converter for Mac. Pavtube MTS/M2TS Converter for Mac(best 5 MTS M2TS Converter Mac Review) can convert MTS files to FCE supported video formats (MPEG-4, DV, MOV, etc) even on the latest Mac OS X Yosemite 10.10.
How to import MTS to FCE for editing and uploading to YouTube?
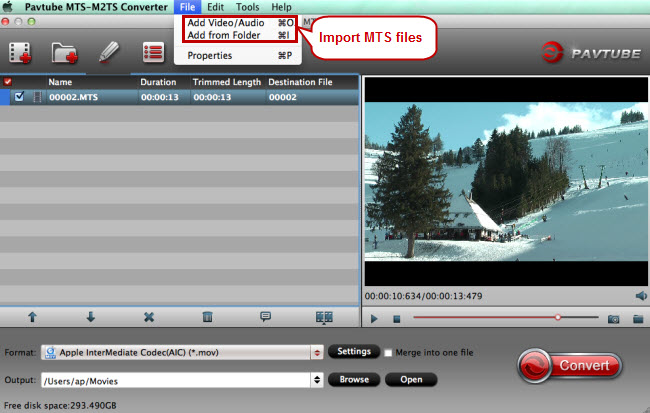
Step 1. Import MTS files
Run MTS to FCE converter for Mac and click “File” to import MTS files.
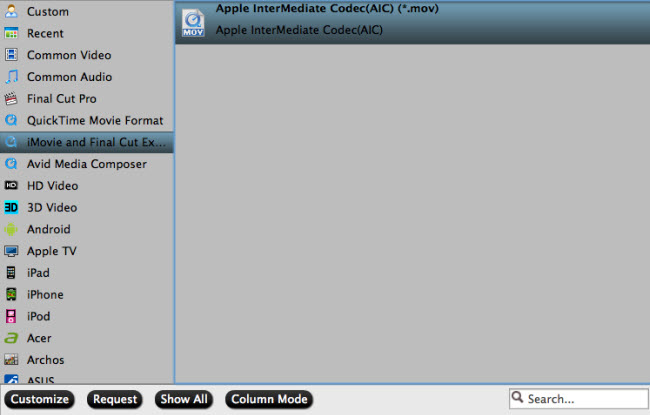
Step 2. Choose FCE best format
Video editors like FCE and iMovie can support Apple InterMediate Codec well. Go to the output format list to follow “iMovie and Final Cut Express” > “Apple InterMediate Codec (AIC) (*mov).”
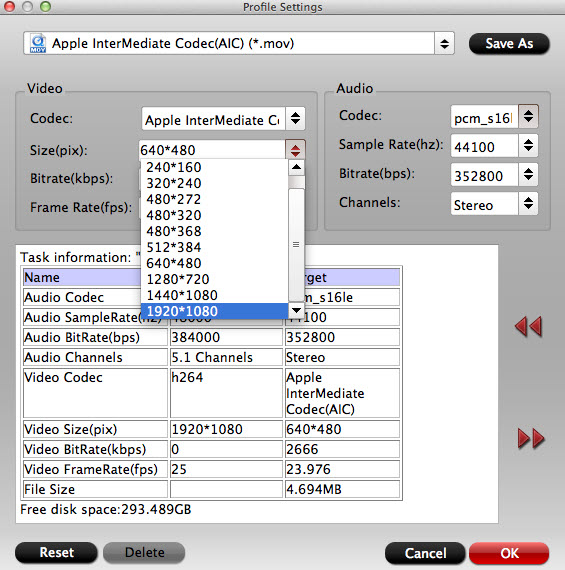
Step 3. Optimize audio and video settings (Optional)
Click “Settings” button to go to “Profile Settings” screen where you can adjust audio and video parameters like size, bitrate, frame rate, sample rate, etc.
Step 4. Edit MTS files (Optional)
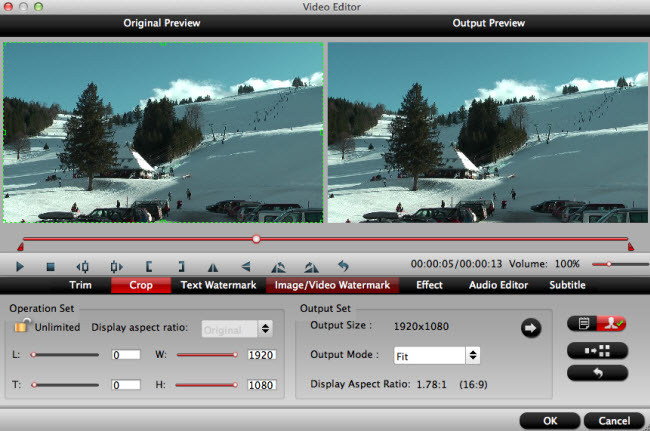
Click the “Edit” button and the “Video Editor” screen will pop up. Try the editing functions like trimming, cropping, adding watermark, special effects, and audio adjustment according to your need.
Step 4. Convert MTS to FCE
Go back to the main UI and hit the “Convert” button to start converting MTS to MOV for Final Cut Express.


