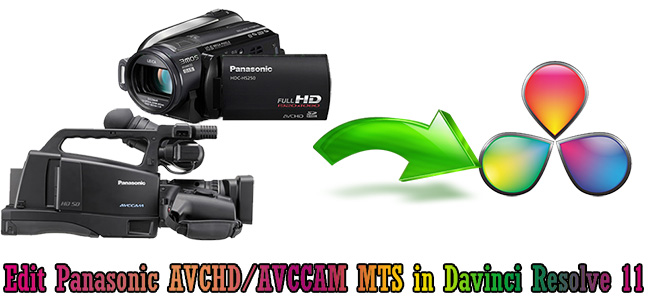
When importing Panasonic AVCHD or AVCCAM files in MTS format natively into DaVinci Resolve 11, many Resolve users may get the notice that there is no audio channels.
Why DaVinci Resolve 11 can’t read audio tracks in an AVCHD or AVCCAM file? Actually Davinci Resolve support lots of file formats, however, different problems will come up with AVCHA or AVCCAM MTS files.
To get audios from in Davinci Resolve 11, heading for a MTS to Davinci Resolve converter is the only way for you. Pavtube MTS/M2TS Converter can help get audios in AVHCD or AVCCAM files work with your Davinci Resolve 11 by transcoding the recorded Panasonic AVCHD / AVCCAM (.MTS) files to DPX, CIN, EXR, DNG, ARI, Apple ProRes MOV, MXF, DNxHD, etc. You can choose one of them as the output format.
How to get audios when importing Panasonic AVCHD/AVCCAM (.MTS) files to DaVinci Resolve 11?
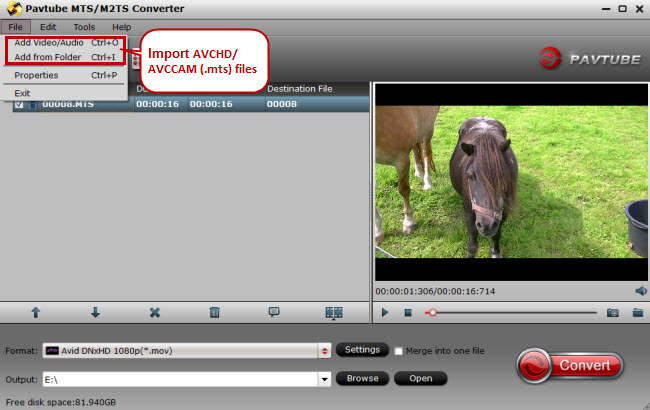
Step 1. Import AVCHD/AVCCAM (.MTS) files
Open up MTS to Resolve converter on PC and import the captured AVCHD or AVCCAM MTS files into it by clicking on “File” > “Add Video/Audio” or “Add from Folder.” To import other unsupported videos like MKV, MP4, AVI, MXF and FLV to Davinci Resolve 11, you’ll need a much more powerful video converter to do the conversion job.
Step 2. Pick the compatible format
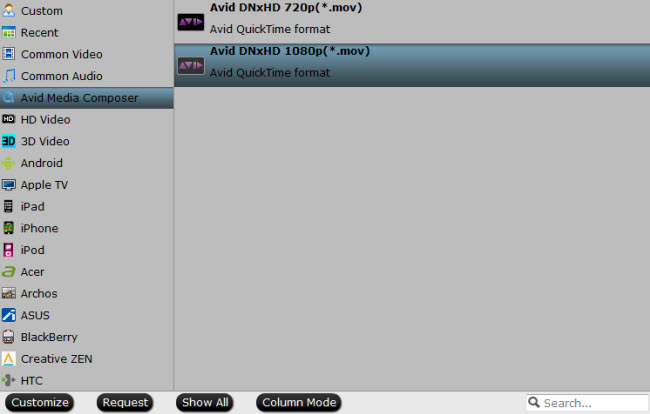
To get audio tracks when importing MTS files to Resolve 11, you can choose video formats like Apple ProRes 422 or DNxHD MOV as output.
To output DNxHD MOV, follow “Avid Media Composer” > “Avid DNxHD 1080p (*.mov).”
Many people would like to use Apple ProRes 422 in Resolve, so an MTS to Resolve converter for Mac can help. And from the format list please pick “Apple ProRes 422 (*.mov)” under “Final Cut Pro.”
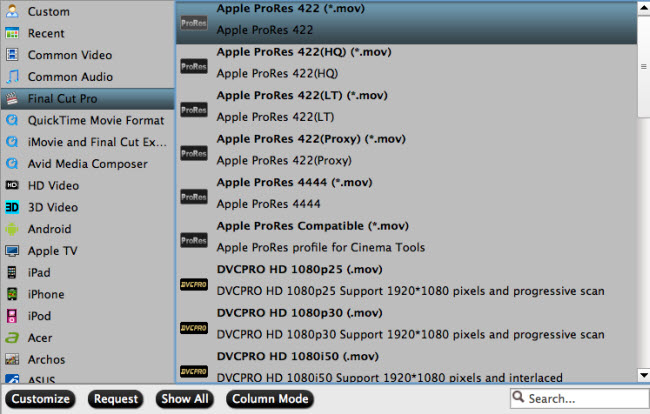
Apple ProRes 422 can work perfect in Davinci Resolve 11. Just go to the format profile to select it as the output from AVCHD or AVCCAM.
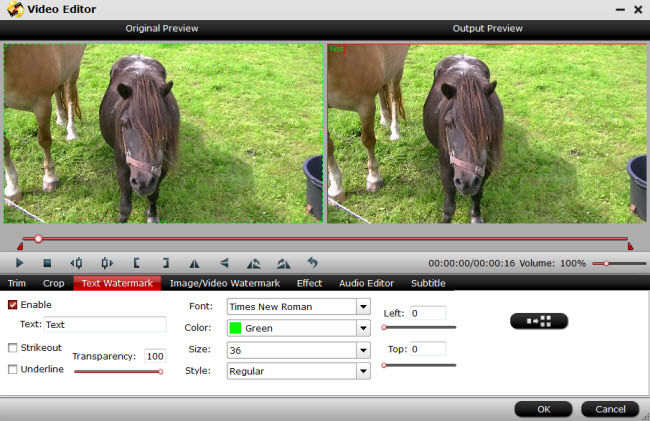
Step 3. Edit MTS files (Optional)
This MTS converter performs both conversion and editing work. To get your AVCHD or ACCCAM MTS files edited with it, just click “Edit” to try editing functions (e.g. get wanted clips, cut off unwanted areas, add additional remarks, adjust effects) which are of great help in “Video Editor” screen.
