Many people use Windows player to play audio and video files on their PC. It is the default media player in windows operating system and it is the best to play all video and audio files.
In terms of file compatibility Windows Media Player 12 is by far the most ecumenical to date. Where Microsoft once tacitly shunned third-party file types - such as Apple's Quicktime (.MOV) and DivX - it now supports an impressive number of file types out of the box. Still avid media enthusiasts will occasionally come across a video file type that Windows Media Player 12 can't handle natively. When we play some videos in Windows Media player it tells us "Windows Media Player cannot play this file the player might not support the file type or might not support the codec that was used to compress the file".
In these cases this article will show you how to play any video formats on Windows Media Player 12. Generally speaking there are two ways.
File types supported by Windows Media Player 12
For your reference here is the page that tells you the list of the video file types that Windows Media Player 12 supports.
The first way: Install a handy codec pack
If you come across a video file type that isn't supported by Windows Media Player 12 you'll receive two notifications. First Windows Media Player 12 will let you know that it doesn't recognize the file extension and will ask you if you'd like to try to play it anyway.
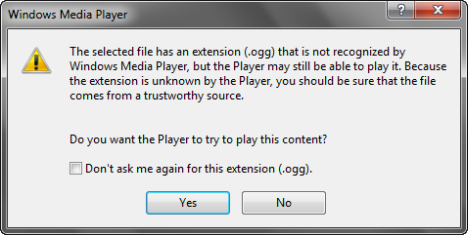
If you click Yes Windows Media Player 12 will try to play it anyway. If it is a case where a supported file type was simply renamed incorrectly it might play. But chances are you'll get a message stating that "Windows Media Player cannot play the file. The Player might not support the file type or might not support the codec that was used to compress the file". In either case the solution is to install the right codec. Click Close to dismiss the window and move on to the next step.
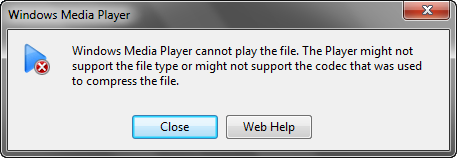
Now you could hunt down the appropriate codec each time this happened and install them one at a time as you go. But that's completely unnecessary and frankly a waste of time. Your best bet is to download an all-in-one codec pack and take care of all the video and audio codecs you might need in the future in one fell swoop.
We prefer the K-Lite Codec Pack. It comes in a variety of editions from Basic to Mega all of which are free. Originally developed for Kazaa Lite users the K-Lite Codec Pack lets you play practically every video format you might encounter on the Internet in Windows Media Player 12.
You can grab the latest version of K-Lite Codec Pack at codecguide.com. Get the Mega version.
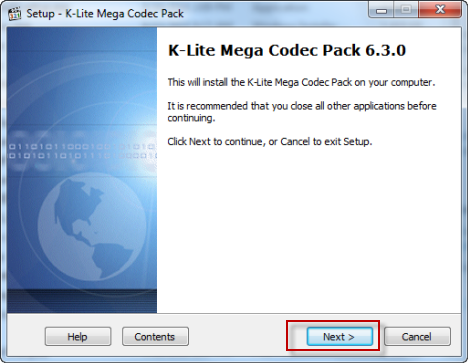
Once it downloads close your web browsers and Windows Media Player 12 and run the install file. You'll be brought to the K-Lite Mega Codec Pack setup wizard. Click Next to begin.
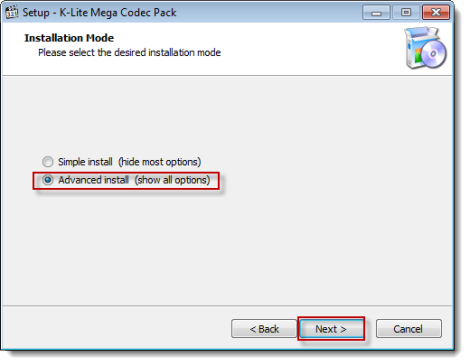
By default K-Lite Mega Codec Pack loads a plethora of relatively unnecessary items and applications onto your computer including Media Player Classic. Since we (and we're assuming you) are dedicated Windows Media Player 12 purists it's best to go with the ‘Advanced install'. Check it and click Next.
Next choose the destination folder where you'd like to install the codec pack and click Next.
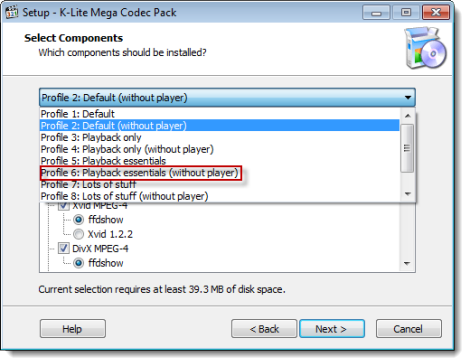
This next screen is where we can opt out of installing Media Player Classic and other unneeded components. We recommend choosing "Profile 6: Playback essentials (without player)". Select it from the drop-down menu and click Next.
The next screen will ask you about internal DXVA decoders. Leave all the boxes unchecked and click Next. If you are curious you can read about DXVA decoders but these options aren't necessary for this tutorial.
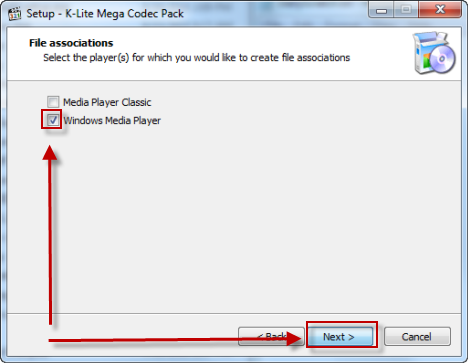
The next prompt is more important - it will ask you which file associations you'd like to set up. If you chose to install Media Player Classic you'll have two options available: Media Player Classic and Windows Media Player. Uncheck Media Player Classic and check Windows Media Player. That way we can keep Windows Media Player 12 as our default media player. Click Next.
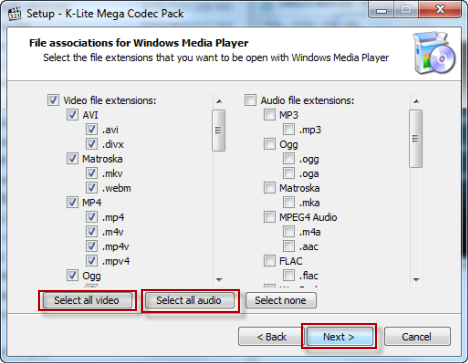
In the next windows choose which files you'd like to associate with Windows Media Player 12. If Windows Media Player 12 is your default player go ahead and click ‘Select all video' and ‘Select all audio' or pick and choose as you see fit. Click Next.
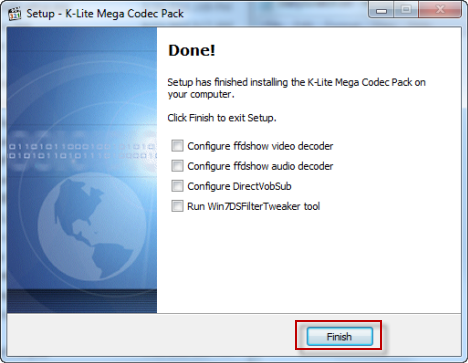
The next couple of windows are inconsequential. Go ahead and click Next until the installation is complete. Then click Finish.
Now you should be able to play the previously unsupported video files just like your other video files.
The second way: Convert the video to Windows Media Player 12 supported format
In this way a powerful converting software is needed. Pavtube Video Converter Ultimate is a professional video converter. It can allow you transfer any video format such as AVI, WMV, MP4, MOV, VOB, FLV, MKV, Tivo, etc to Windows Media Player supported formats such as MP4, AVI, WMV, WMA, etc. So that you can play any video on Windows Media Player freely.
Actually it is much more than a converter - Convert edit enhance organize capture and watch any HD Videos and Movies.
With it you can also copy the entire BD/DVD disc content to computer hard drive with original structure and all audio/subtitle tracks and chapter markers preserved. Save a 100% intact BD M2TS/DVD VOB movie without extras with Directly Copy.
How to convert any video format to Window Media Player 12?
Let's take TiVo file as an example, and please refer to this article to learn the guide of converting Tivo to Windows Media Player
Hot Search: DVD to Windows Media Player | iTunes to Windows Media Player
Conclusion
Above are the two ways of playing all video formats on Windows Media Player 12. You can choose any one of them. Check out the screenshot to see what happens when we try the ".OGG" file from the tutorials - Success! The video loads and plays correctly.
