For movies fans, ripping Blu-ray disc is a convenient way to store their high quality movies into various devices. Ripped movies can be saved on DLNA server, then stream to Roku to watch on TV, or play with VLC player on iPad.

One of the most popular solution is MakeMKV+Handbrake. Use MakeMKV to remove Blu-ray disc protection and output as MKV file, then load MKV to Handbrake, convert it to Roku supported format like MP4, etc. It's my piece of choice a year ago, but didn't really want to use free tool method that uses two separate apps, let alone have to relearn the steps each time.
Therefore if you are looking for an all-in-one Blu-ray ripper with fast speed and pretty good video quality, you should not miss Pavtube iMedia Converter for Mac.
How to rip Blu-ray to MP4 for Roku and iPad in one step
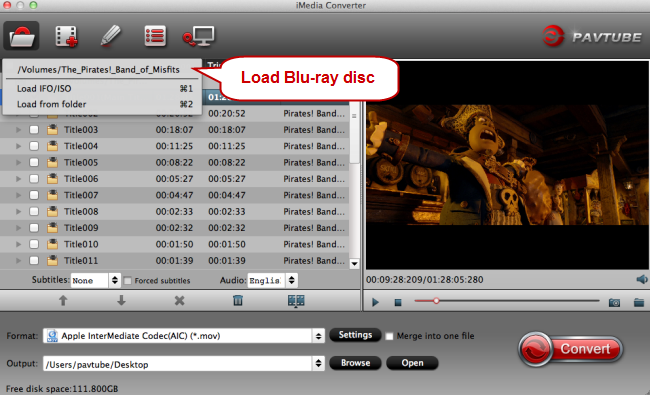
Step 1. Load your Blu-ray
Run Pavtube iMedia Converter for Mac, load your Blu-ray disc, folder, ISO image files by clicking the "File" icon.

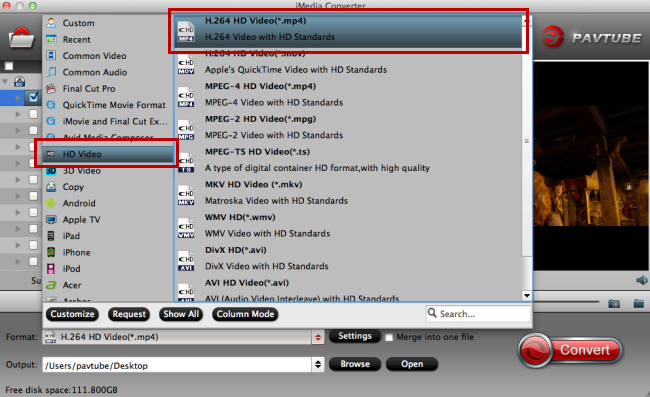
Step 2. Output Roku supported file format
Click the format bar to choose Roku playable format from "HD Video" > "H.264 HD Video (*.mp4)".

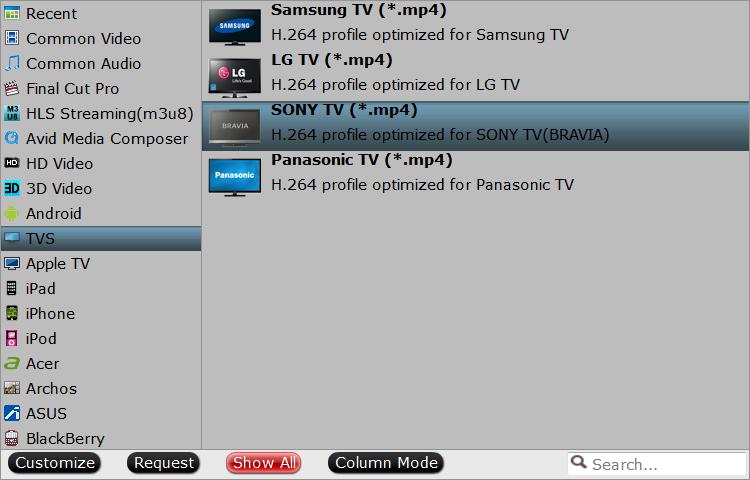
To stream Blu-ray from Roku to iPad, you can select to choose iPad compatible H.264 HD or MPEG-4 file format. If you want to watch Blu-ray movies on TV with Roku, the program also allows you to output different brand TV optimized file formats.

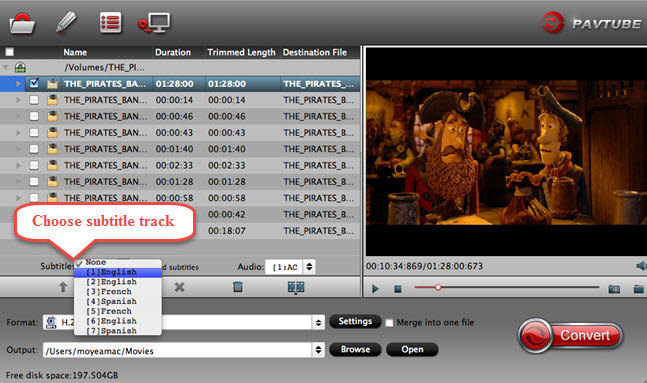
To convert Blu-ray with subtitles or closed captioning, click the subtitle dropdown menu to choose your desired subtitles. If you want your subtitles or closed captioning shown in the movie all the way, please make sure the "Forced subtitles" box is unchecked. You can also choose your desired audio tracks here.

Step 4. Start conversion
After everything is OK, click the big button "Convert" to start conversion. After conversion, you'll get your desired MP4 movie with subtitles or closed captioning in it. Save the ripped MP4 movie on DLNA server, then stream to roku for watching on TV, or playing with VLC player on iPad.


