When ripping DVD movies for free playback on a HDTV, PC, projector, or mobile devices, you may feel uncertain about what is the correct or better aspect ratio for your ripped DVDs, or never feel the need to resize the video/image. To get maximum entertainment with the ripped DVDs on a wide-screen HDTV, laptop, projector or portable devices, you’d better adjust the correct or suitable aspect ratio during DVD ripping, otherwise you may get the ripped DVD image with the poor effects like annoying black bars.
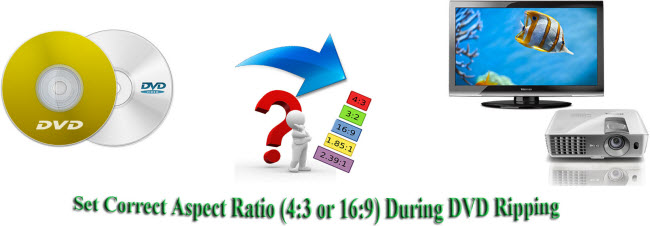
The DVD specification supports both 4:3 and 16:9 sources. Then what is the different between the two aspect ratios? 16:9 is wide screen and fills the entire screen of an HDTV (Plasma/LCD). If you want to watch a 4:3 DVD movie on a 16:9 display, you will see black bars /edges on the left and right. 4:3 is standard or full screen and fills the entire screen of a SDTV and would have black bars/edges on top and bottom if you are watching a widescreen movie on an SDTV. How to choose the correct aspect ratio during DVD ripping? A DVD converter will meet your requirement, and Pavtube DVDAid is just what you need to convert your DVD movies to the video formats compatible with devices such as iOS/Android/Windows series, PC, HDTV, HD media players, game consoles, or to the video formats accepted by the video website like Youtube for sharing.
How to set the correct aspect ratio during DVD ripping?
Step 1. Load DVD movie
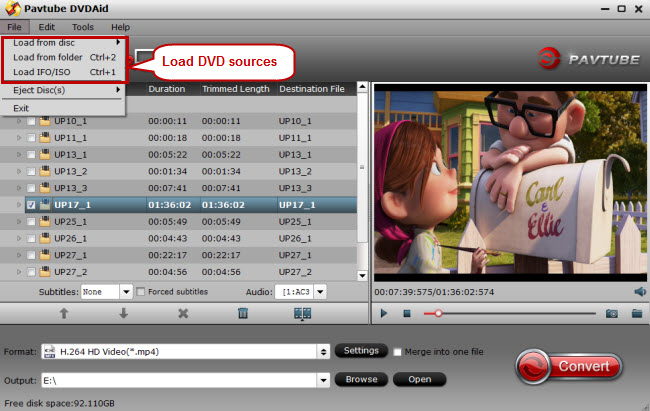
Run this DVD converter on Windows PC (Mac version is also available), and click “File” to follow “Load from disc”/“Load from folder”/“Load IFO/ISO” to import your DVD sources.
Step 2. Select a compatible format
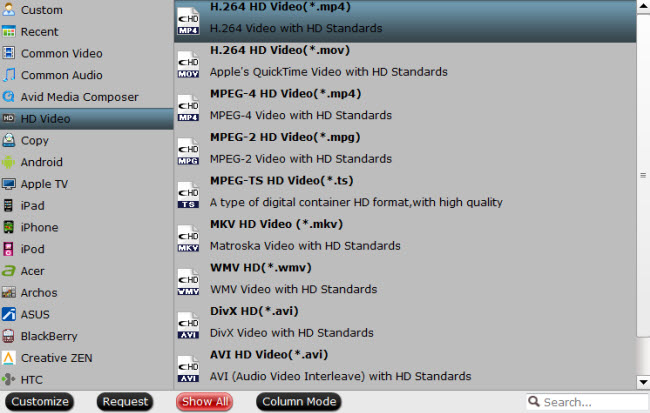
Click the format bar to choose a proper video format for your device.
Step 3. Set proper aspect ratio for 4:3/16:9 display
a. Set proper aspect ratio for a 4:3 display
It is unnecessary for you to change the aspect ratio if the display screen is in a 4:3 format.
b. Set proper aspect ratio for a 16:9 display
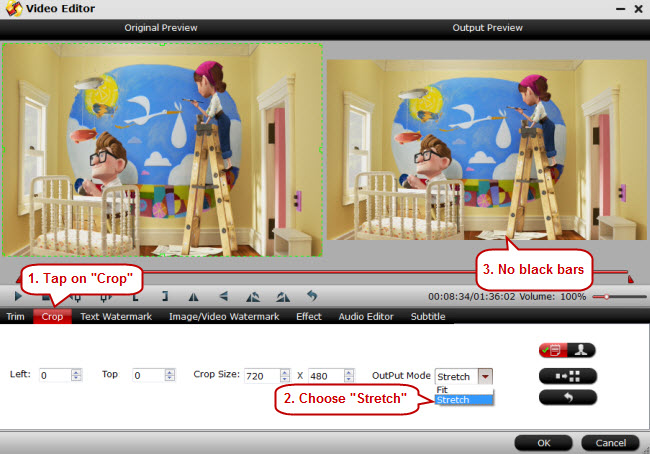
If you want to enjoy a 16:9 display, and don’t mind that the picture/image will be stretched too much, click “Edit” on menu bar to switch to “Video Editor” interface, tap on “Crop” and choose “Stretch” from “Output Mode” dropdown list. Then the black bars will disappear on the output window.
How to cut off black bars/edges?
This DVD converter is designed to cut off black bars/edges to enable you to get a better enjoyment. The preview window and output window can ensure precise cropping. Drag the green frame in preview window to get rid of black bars/edges.
Tips:
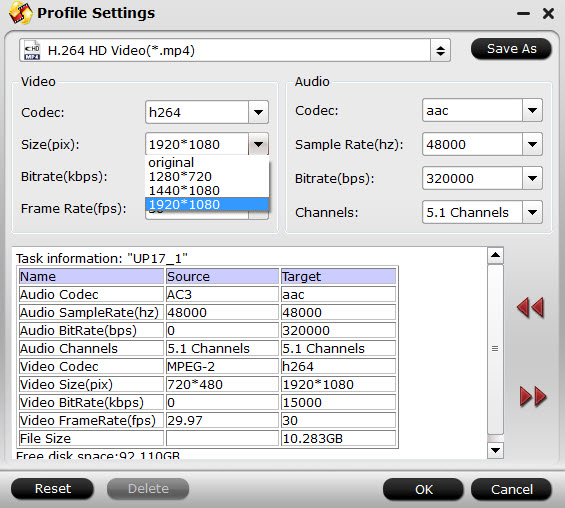
To avoid DVD playback with black bars/edges, you can click “Settings” go to “Profile Settings” to change sizes and you can choose “Original”, “1920*1080”, “1208*720”, “1440*1080”, etc under the “Size” dropdown list.
Step 4. Convert DVD movies
Go back to the main UI and click “Convert” to start ripping your DVD movies and then you can enjoy them on your 4:3 or 16:9 displays with correct or proper aspect ratio.


