As a free and versatile multi media player, VLC not only provides audio and video playback function. There are many hidden functions about VLC player you may not know, and streaming audio and video is just one of them.

Step 1. Run VLC player
Download and launch VLC player on your PC. Follow “Media” “Stream” on the main UI. And the “Open Media” window will pop out.
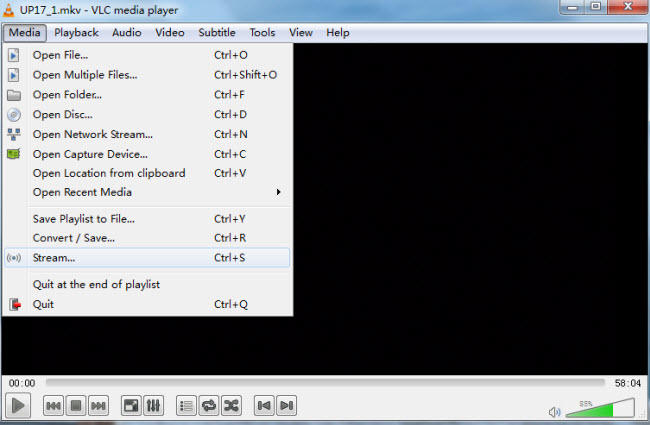
Step 2. Add audio/video to stream
On “Open Media” window, click “File.” Then click “Add” button to add a file you want to stream from either from PC or a DVD in your disc drive. At the bottom of the window, switch “Play” option to “Stream” option.
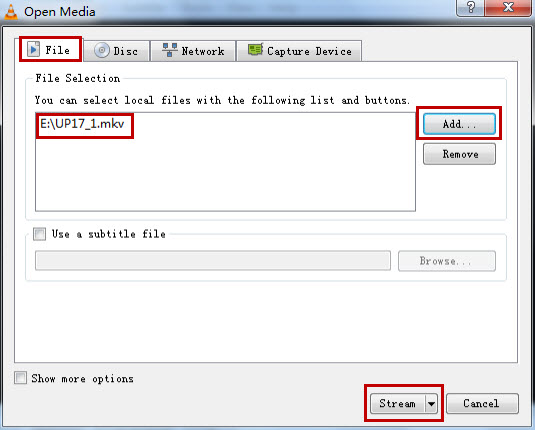
Step 3. Stream the selected audio/video file
After choosing the “Stream” option at Step 2, click on “Stream” and the “Stream Output” window pops out.
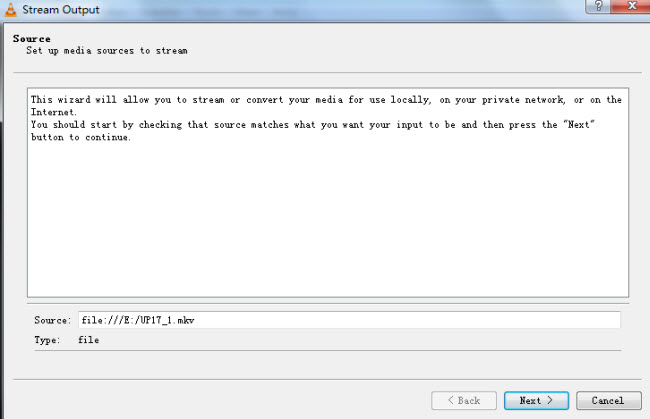
Step 4. Set the streaming destination
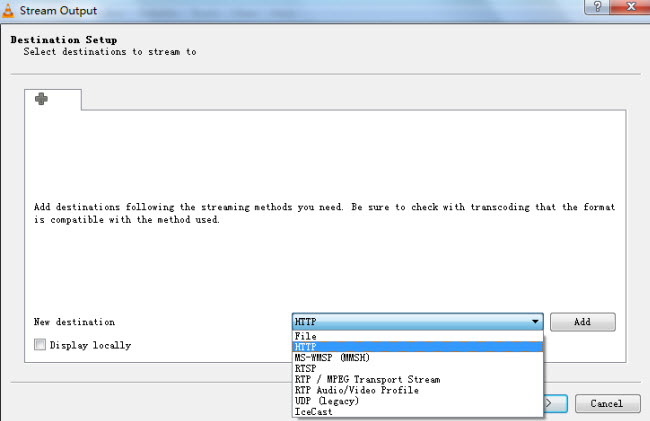
On “Stream Output” screen, click on “Next,” and you’ll be taken to the “Destination Setup” where you can choose the destination.
After selecting a destination, click the “Add” button.
Step 5. Pick a port number
Pick a port number, and make sure no other program uses this number. Click on “Next.”
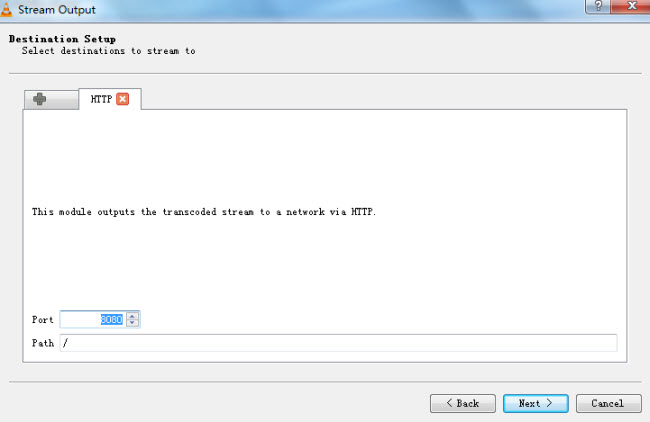
Step 4. Proper file format for streaming
If you’re streaming to a tablet or iPhone, choose “MP4.” Then click on “Next.”
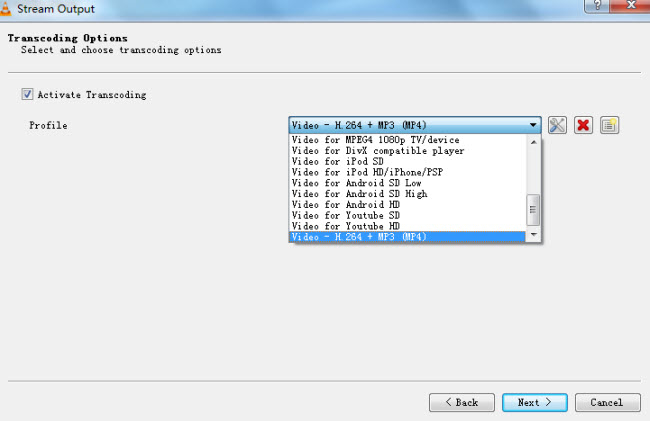
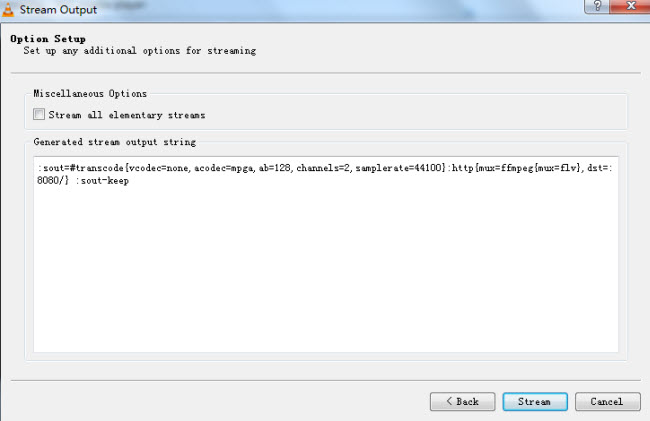
Step 6. Start streaming
Simply click “Stream” button to start streaming the selected audio or video files.
Part II. Open a Network Stream
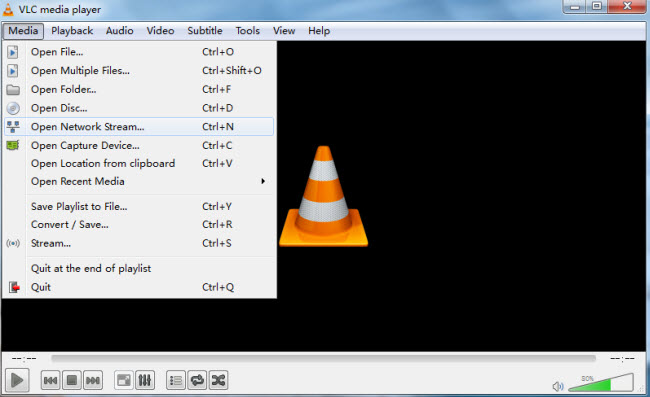
Step 1. Launch VLC and choose network stream
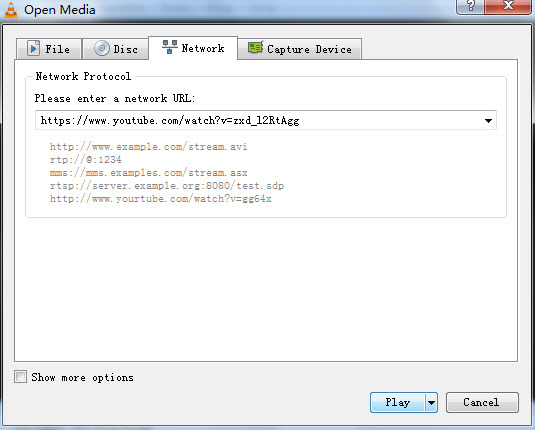
Download and run VLC player and click on “Media” “Open Network Stream” and you’ll be let to the “Open Media” window.
Step 2. Enter a network URL
On the “Open Media” screen, enter a network URL for the audio or video file you want to stream under “Network” option.
Step 3. Play the selected audio/video
After entering a URL, click “Play” and you’re able to play the selected audio or video file in a stream.