Anyone who has captured a lot of great footage with your Sony XDCAM may want to share them using YouTube or other video sharing websites like Vimeo or Facebook. It's pretty easy to upload videos from your Sony XDCAM to share on social networking sites. First, you will need to transfer the video footage from the camcorder to the computer and then convert them to files formats that can be uploaded to video sharing sites. Go with the steps below:

Step 1: Transfer Sony XDCAM to the computer.
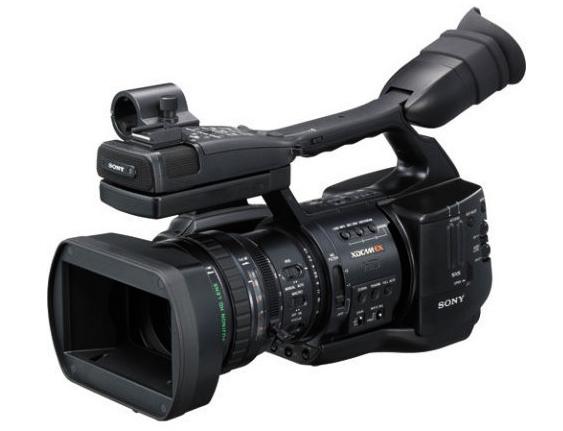
The Sony XDCAM product lines including XDCAM SD, XDCAM HD, XDCAM EX and XDCAM HD422.
The XDCAM and XDCAM HD records video on professional disc drive. And the footage can be exported to computer by connecting the professional disc drive to your computer via the USB 2.0 port.
The Sony XDCAM EX camcorders record video footage on memory stick, secure digital or XQD memory cards. You can transfer the footage to your computer by inserting the card into a card reader, then plug your card reader into your computer's USB port.
Step 2: Convert Sony XDCAM to best web sharing formats.
As one of the most commonly used formats for the recording, compression and distribution of video content, H.264 is also widely used by streaming internet sources such as videos from YouTube, Vimeo and Facebook since it can provide good video quality at substantial lower bit rates. Here, you can encode Sony XDCAM to YouTube/Vimeo/Facebook compatible H.264 MP4 format with some third-party application like Pavtube HD Video Converter for Mac.

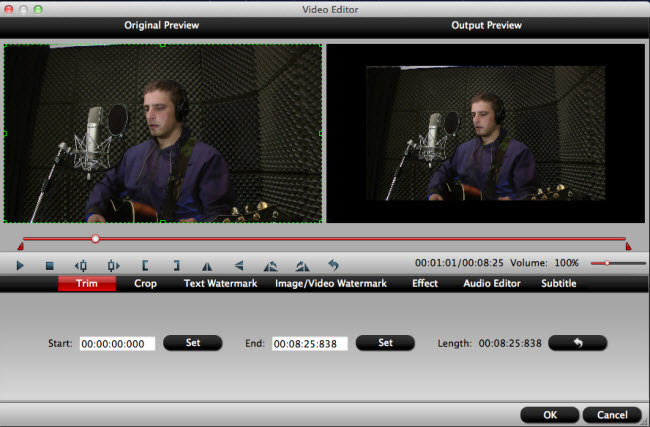
Video with small file size will be more smooth during the uploading process, therefore, it is ideal to choose one of your favorite segments from the large file size. You can use the "trim"function with the program to cut off your unwanted parts and only convert your selected clips.

Step 3: Register your user account on Social Networking Sites.
Open the video sharing sites, register for an account and then logo into your account to upload videos to social networking sites.
Step 4: Upload Sony XDCAM to YouTube/Vimeo/Facebook.
Click the "Upload" button to locate and add files that you have saved in your local drive to the sites.
Step 5: Add title, tags and description for the videos.
Set your video with related title, descriptions, tags and category so that people can find your videos easier.
Step 6: Start video uploading process.
After all the setting is over, hit the "publish" or "upload" button will start the video uploading process immediately. It will take minutes or hours for the whole video to be uploaded successfully.
Preferable video parameters for uploading to YouTube/Vimeo/Facebook
YouTube:
Container: MP4
Audio codec: AAC-LC
Audio channels: Stereo or Stereo + 5.1
Audio sample rate: 96khz or 48khz
Video codec: H.264 High Profile Video
Scan mode: Progressive scan not interlacing
Bit rate: variable bit rate, no bit rate limit required.
Chroma subsampling: 4:2:0
Frame rate: content should be encoded and uploaded in the same frame rate it was recorded. Common frame rates include: 24, 25, 30, 48, 50, 60 frames per second (other frames are also acceptable).
Resolution: 2160p(3840x2160), 1440p(2560x1440), 1080p(1920x1080)
Aspect Ratio: 16:9
Vimeo:
Size: a maximum of 500MB of uploading per week, and 5 GB for plus members
Length: less than 20 minutes
Aspect Ratio: 16x9 or 9x16
Codec:H.264 video with AAC audio in MP4 or MOV format
Size: no more than 1024MB
Frame Rate: a maximum frame rate of 30 frames per second
Audio Sample Rate: 22050hz or 44100hz
Make sure to add tags that people normally search for to your videos so that people can find your videos easier.


