Have a good number of DVDs in your household's DVD library and wish to enjoy your favorite DVD movies not only on standard DVD player, computer DVD player software or game consoles like PS4 or Xbox but also on smartphone, tablets or laptop which doesn't equip with a DVD drive. Why not digitize your DVD disc into popular file formats, so that you can conveniently distribute them anywhere as you like. The following article will show you how to easily make a DVD digitizing process with the best DVD Ripper software.

The great benefits of digitizing your DVD library
- Enjoy DVD movies directly on your tablets, computer, DVD player, game consoles and even your HD/4K TV.
- Protect your precious DVD disc from scratched, damaged or lossage.
- Conveniently streaming and watching DVD movies when you are travelling with no Internet access
What you should prepare to digitize DVD movies?
- An external hard drive
Do not want the digitized movies occupy too much space on your computer hard drive, it would be much ideal for to prepare an external hard drive, so that you can take it with you and connect it to your smartphone or table via a USB cable. For standard DVD collection, you will need at least a terabyte of space. The average movie will probably clock in at about 1.5GB each. Therefore, 500 movies x 1.5GB =750GB. So the 1TB of space should do you just fine.
- A good DVD Ripper software
Although there are many free DVD Ripper software out there that can do the DVD movie digitizing process, however, you may find that a lot of free DVD disc rippers won't be able to rip commercial DVD disc. In addition, even some free program claims such as DVD Decrypter claims to bypass protection from DVD disc, however, you may find that it does not work with many new DVD disc. The main reason is that disc encryption frequently changes and becomes harder to crack, so you'll need to get a good program that can bypass this encryption and keeps updates so it can break the most recent encryption. The best program I highly recomended here for ripping DVD to digital format is Pavtube DVDAid (best DVD Ripper review). The program provides breakthrough performance to bypass all DVD copy and region protection including region code, RCE, key2Audio, UOP, CSS, Macrovision, Disney X-project DRM (99 titles DVD encryption included), FluxDVD, Protect, ARccOS, AACS, BD+, ROM Mark, BD-Live, etc. The various output options enable you to digitize DVD movies in different ways according to your own needs:
- A full disc copy of DVD in original structure and save as a Video_TS folder with no quality loss.
- A fast main movie copy of DVD and save as a VOB file without unwanted ads, trailer, comments, reviews, warning and titbits, etc.
- Rip DVD to popular digital file formats such as MP4, MKV, MOV, AVI, WMV for better viewing on media players or portable devices.
- Directly output DVD to popular portable devices such as iPhone, iPad, Android Phone or tablets, Windows Phone/tablets, game consoles, TVs, TV-Set boxes, etc preset profile formats with the optimal playback settings.
- Better go with the DVD movies by extracting subtitle from original DVD movies, enable forced subtitles or add external subtitles to DVD movies.
For your great convenience, the program is available on both Windows and Mac, you can download the Mac version - Pavtube DVDAid for Mac to perform DVD digitizing process on Mac OS X El Capitan or macOS Sierra.
How to Digitize DVD Collection in Various Different Ways?
Step 1: Load DVD disc into the program.
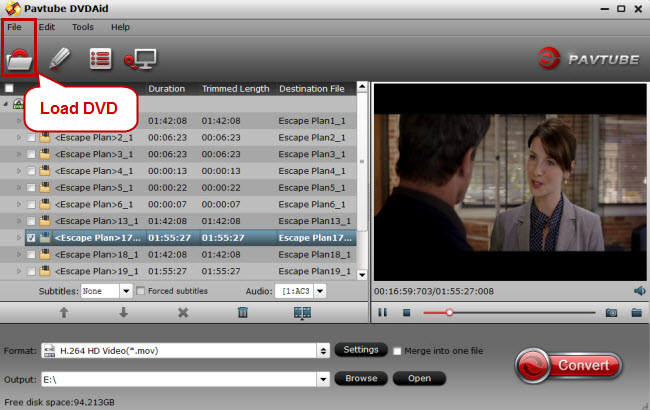
Run the program on your computer, insert the DVD disc into the optical DVD drive. Click "File" > "Load from disc" to load DVD disc into the program. Apart from DVD disc, you can also use the program to rip DVD folder and IFO/ISO image file.

Step 2: Output different digital file format.
Full disc copy
Make a full disc copy by hitting the  icon on the top tool bar of the main interface.
Main movie copy
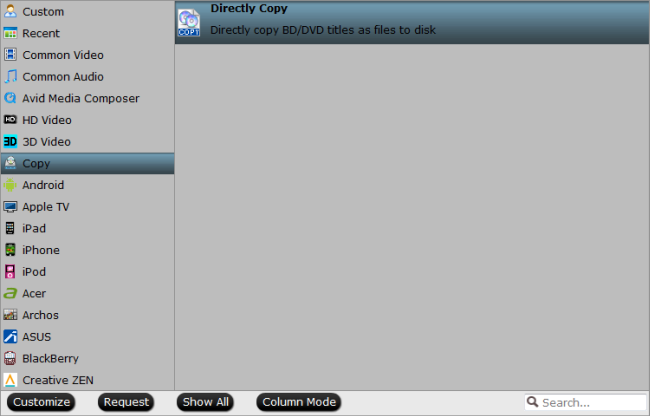
From "Format" bar, select "Copy" > "Direct Copy" to copy the main movie of the DVD disc.

Output digital file formats or device preset profile formats
From "Format" bar drop-down list, select one of your desired file formats or device preset profile formats according to your own needs.

Step 3: Begin the DVD digitizing process.
After finishing all the settings, go back to the main interface, press the right-bottom "Convert" button to start DVD to your desired digital file format conversion process.
When the conversion is completed, click "Open output folder", a window will pop out with all your converted files. You will then be able to copy the converted DVD files to external hard drive or transfer and view on different portable devices.


